Create and Release a Warehouse Transfer
Warehouse Transfers move Inventory from one Warehouse in your system to another. The Inventory remains under the same Owner and Project, so all that is changing is the Location over separate Warehouses.
Note
Creating a Warehouse Transfer also involves the creation of an Outbound Shipment and an Inbound Shipment. Both Shipments will share Order Lines, so the process is streamlined. Following the creation of the Warehouse Transfer Order, you must complete the standard Outbound process, then the Inbound process using ASN Receiving.
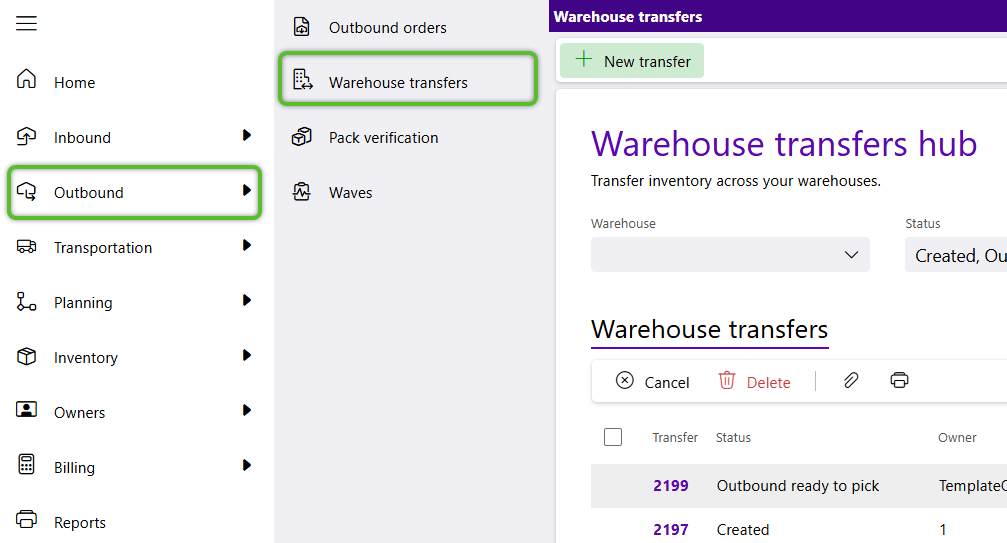
1. Click Outbound in the left navigation menu, then click Warehouse Transfers.
The Warehouse Transfers Hub will display.
2. Click + New Warehouse Transfer in the top Warehouse Transfer Hub toolbar.
3. In the Create Warehouse Transfer window, select the Owner and Project for the Inventory to be transferred.
4. Select the Source Warehouse where the Inventory currently exists, and the Target Warehouse to which the materials will be moved.
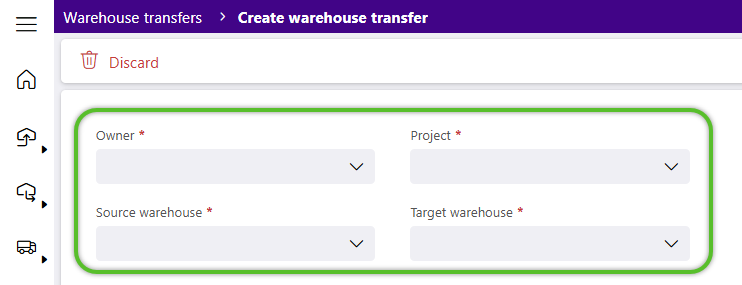
The Warehouse Transfer details window will appear as soon as the required items above have been selected.
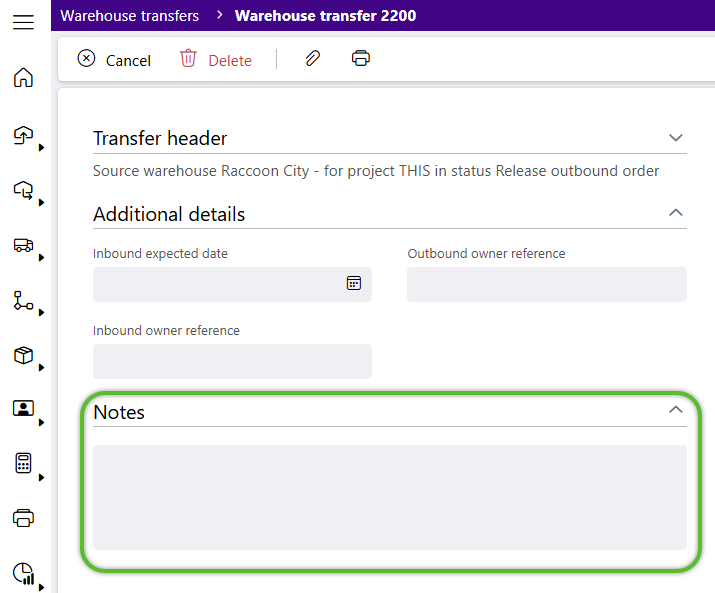
5. If needed, enter any Notes for the Warehouse Transfer.
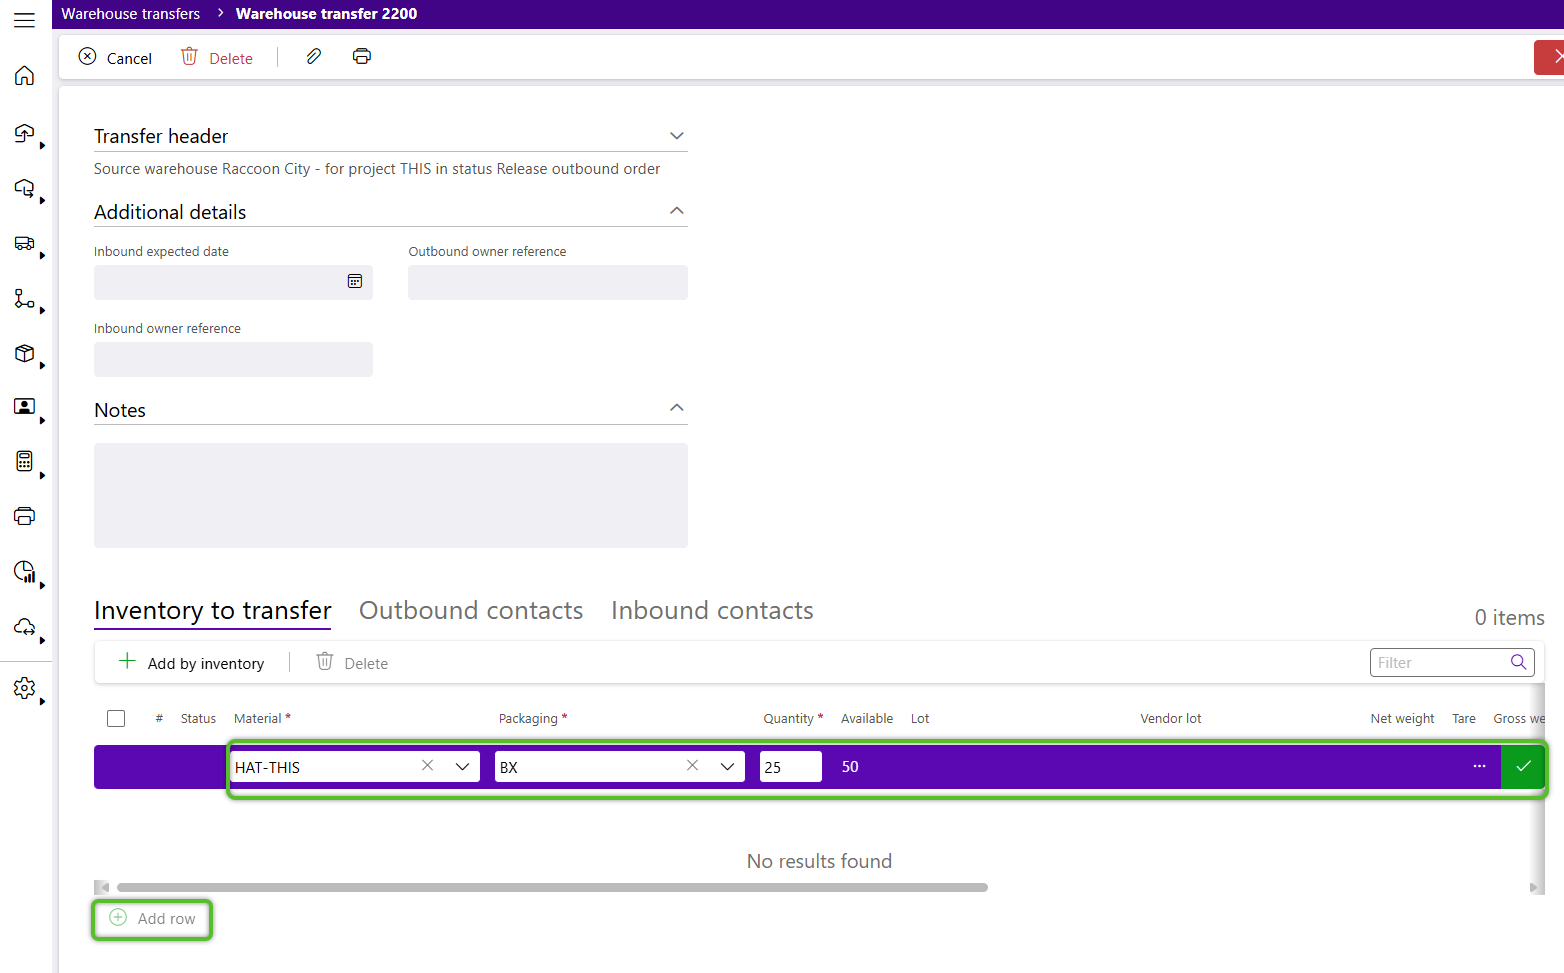
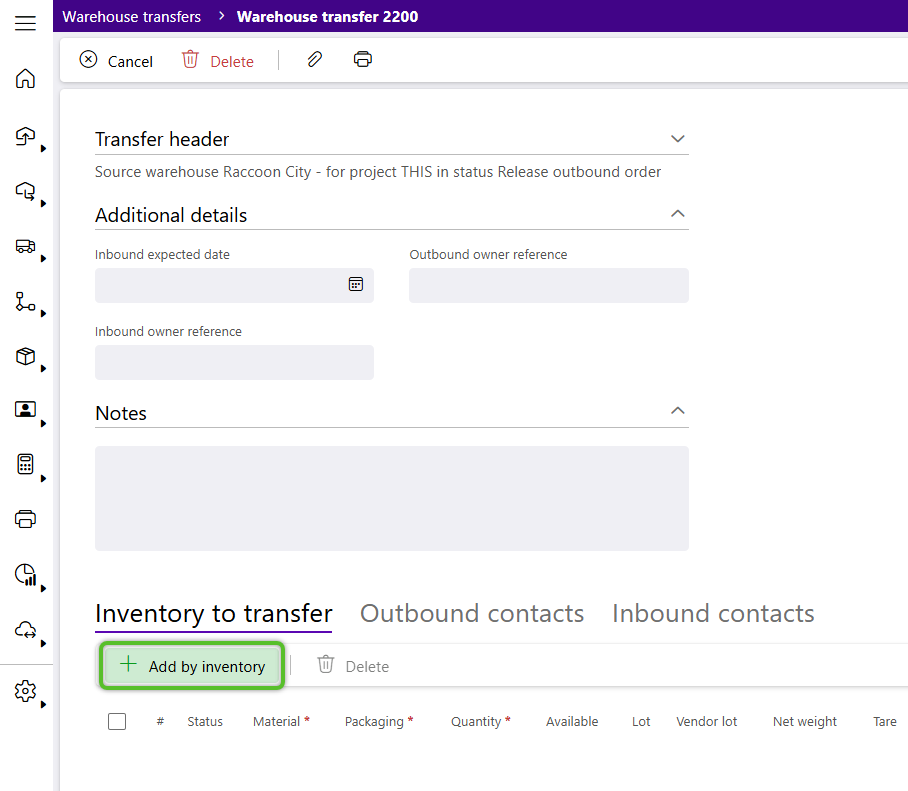
6. Select Inventory to Transfer by entering or searching for Inventory in the Inventory to Transfer tab.
Add Inventory Order Lines
a. To add Inventory using Order Lines, click + Add Row in the bottom left corner of the Inventory to Transfer tab.
b. Enter the required Material, Packaging, and Quantity, and any other desired details, then click the green check mark in the right column.
Locate Inventory by Type Wizard
a. To add Inventory by LP, Lot, License Plate Lot, CLP, or Serial, click + Add by Inventory in the Inventory to Transfer tab toolbar.
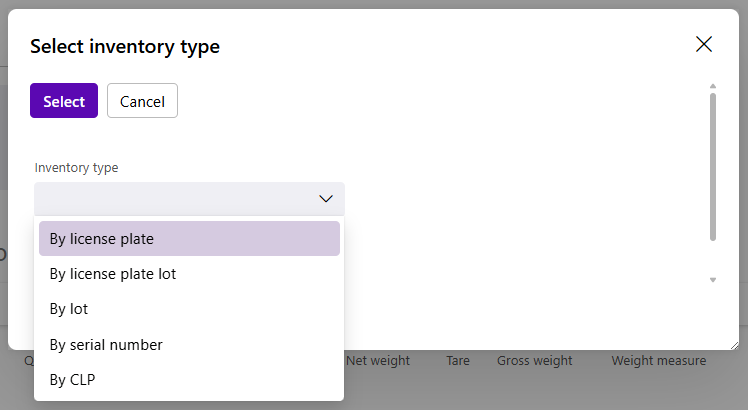
b. Select to search for Inventory By license plate, By license plate lot, By lot, By serial number, or By CLP, then click the Select button to continue to the respective Inventory selection wizard.
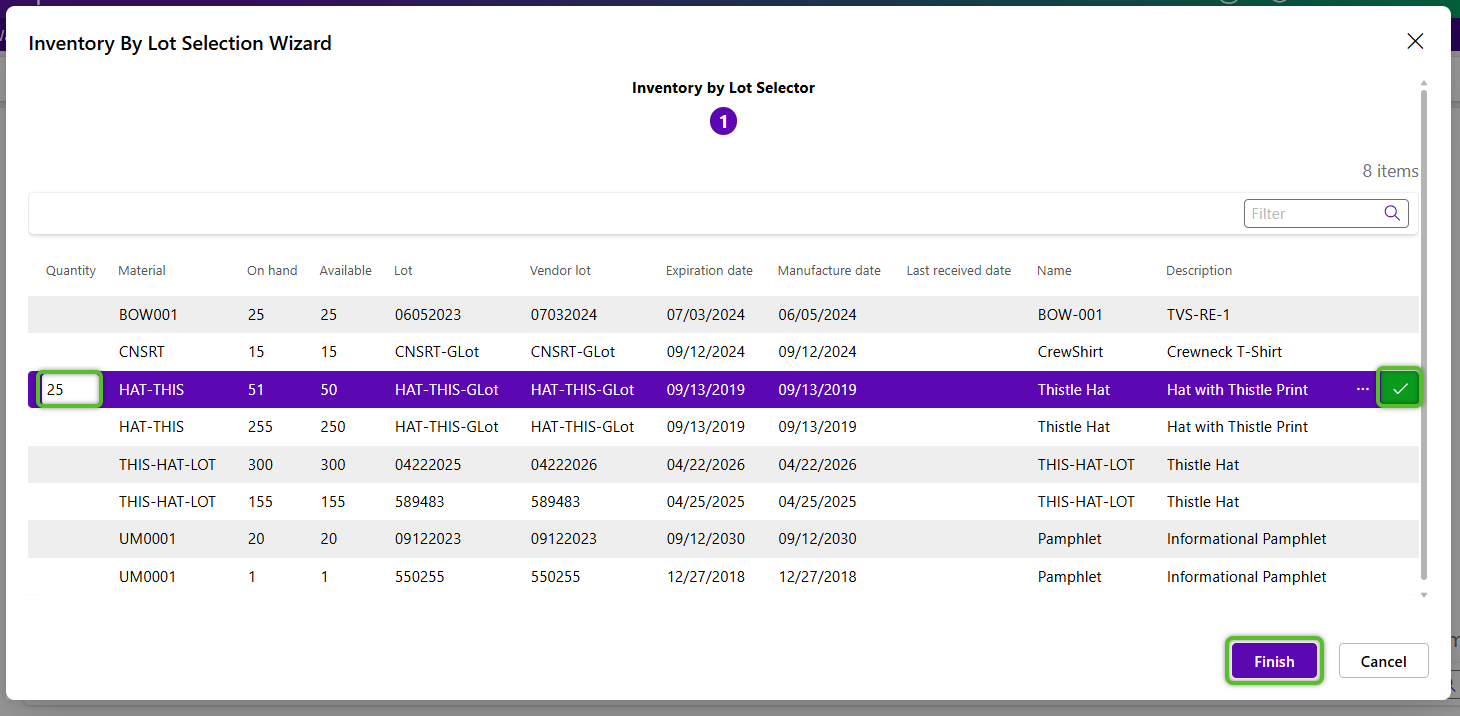
c. Enter the Quantity of each Material to be transferred (or select the specific serial lookups if adding Inventory By Serial), click the checkmark to confirm the row, then click the Finish button to exit the wizard.
8. Continue adding Inventory until all Materials to be transferred are listed in the Inventory to Transfer tab.
Note
Materials listed in the Inventory to Transfer tab can only be edited when the Warehouse Transfer is in Created status. Once the Warehouse Transfer has been Released, only the Notes and Target Warehouse can be updated. While the Outbound and Inbound Orders can be reviewed, they cannot be updated.
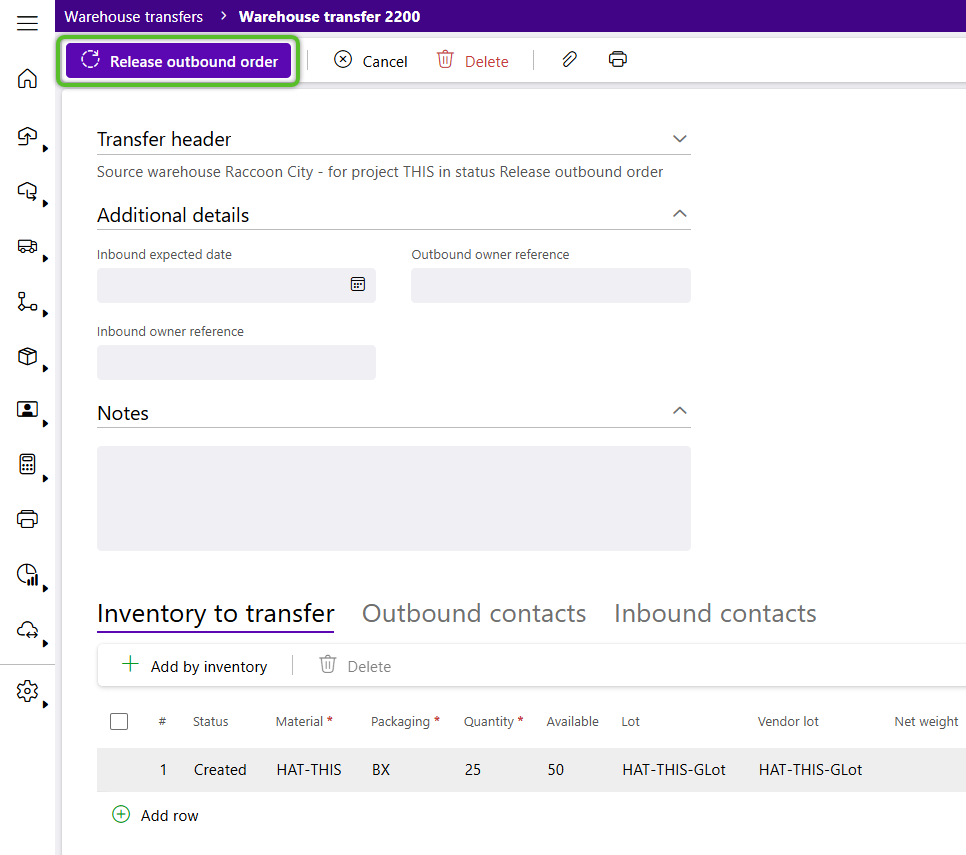
9. Once all inventory to be moved has been added to the Warehouse Transfer order, click Release Outbound Order in the top toolbar.
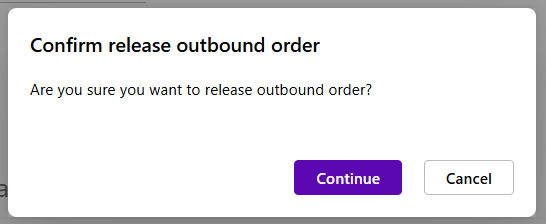
10. Click the Continue button to confirm release of the outbound order.
The Warehouse Transfer Order will Process and the Wave will be Released.
The transfer will be listed in the Warehouse Transfers Hub with the Outbound Ready to Pick status.
| Last Updated: |
| 08/12/2025 |
Copyright © 2026 Datex Corporation